
Quick and Easy Guide for spc flooring Installation
SPC flooring installation is always a top concern for SPC flooring users. How to install and maintain SPC flooring
properly to get a great decoration effect and make the floor work longer? I will give you a detailed installation guide
to help you get the job done quickly and properly.
Precautions before installation
· SPC flooring should be leveled and placed on site with constant temperature and stability for 24 hours before installation;
· Make sure the subfloor is smooth and clean before installing the flooring, without any residue;
· When installing the flooring, the indoor temperature should be kept between 15 °C and 28 °C. Indoor temperature
and surface temperature at 15 °C are recommended. When the temperature is lower than 5 °C or higher than 30 °C,
the installation shall not be performed. The relative air humidity suitable for construction should be between 20% and 75%.
· The moisture content of the base layer shall be less than 3%. The strength of the base layer shall not be lower than
the requirement of concrete strength C-20, otherwise suitable self-leveling should be used to strengthen the strength.
The surface hardness of the base layer is not less than 1.2 MPa.
Installation
Follow the following installation steps can make your SPC flooring installation simple and quick.

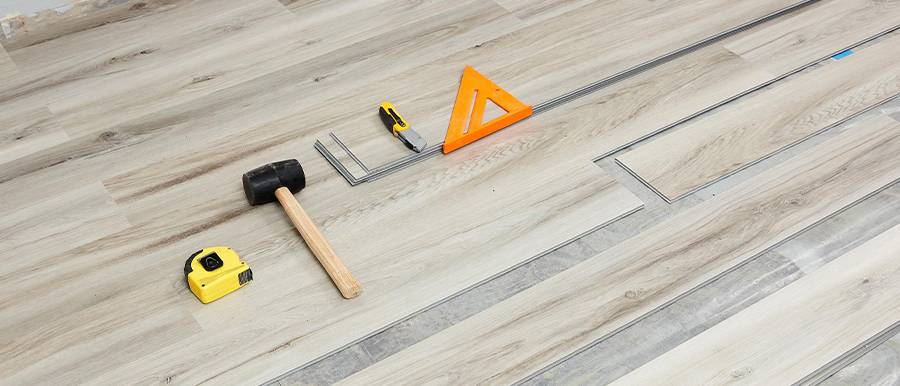
Step 1Before installation, it is recommended to spread floor film, which can make better feeling of feet and prevent
the noise generated between the ground and the floor by small grains of sand. Put the first floor from the left corner
of the room.

Step 2To prevent the natural expansion of the floor, at least 0.4 cm gap should be reserved between the wall and the floor.

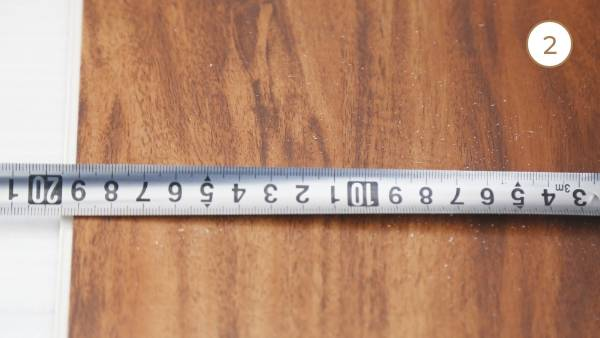
Step 3When installing the first and second floor, insert the convex damage of the short side into the groove of the
first floor. Continue to use the above method to install other floors.
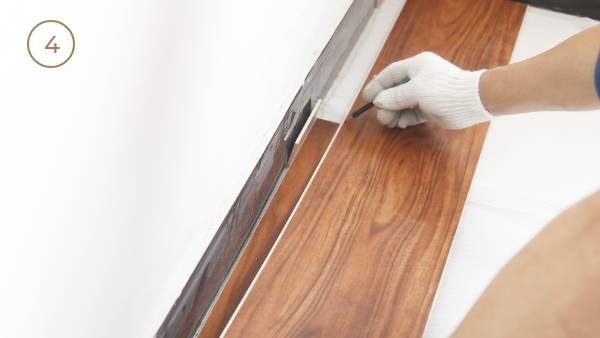

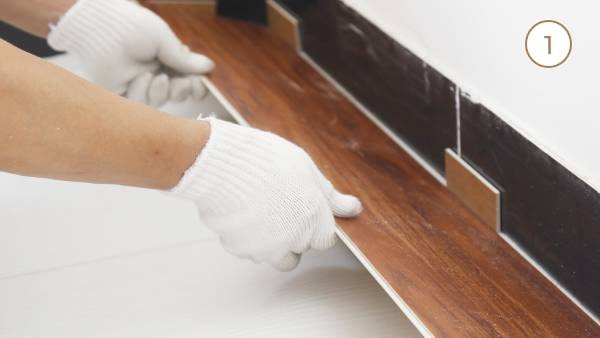
Step 4When installing the last piece of the first row, you need to take the remaining part of the floor measurement
first, and note that the floor needs to be measured in reverse.
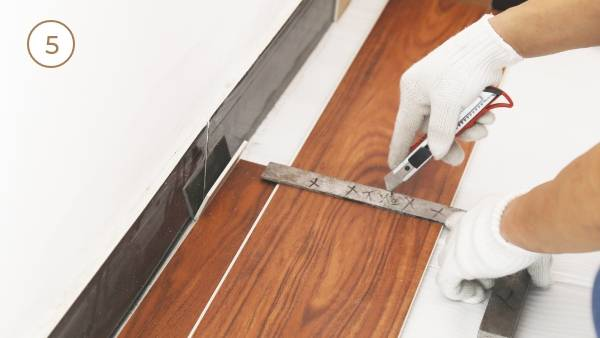

Step 5Finally, use the art knife to force the floor surface, break it by hands easily, then install the last floor of the first row.


Step 6Start installing the second row. When installing the second floor, insert the convex of the short side into the
groove of the previous floor, and gently insert the convex of the long side into the corresponding floor groove.
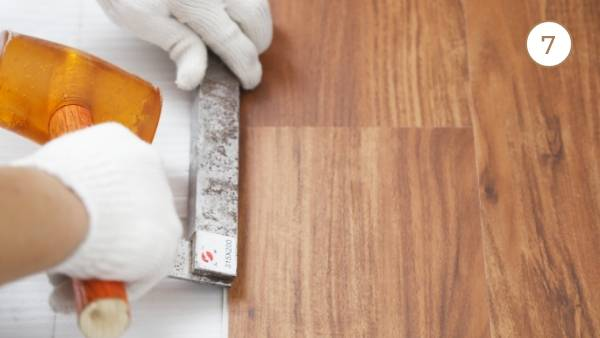

Step 7Use a rubber hammer when there are gaps.
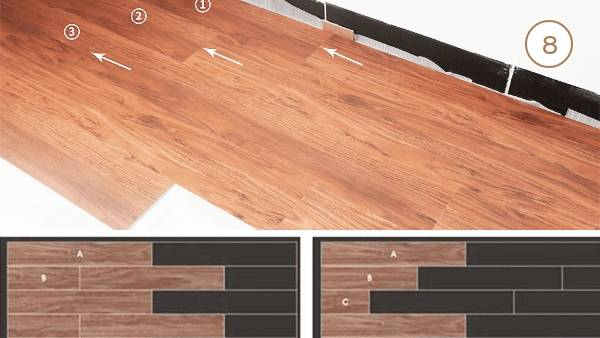

Step 8Recommended installation method reference picture.


Step 9Finally, the same method can be used to install other floors in the room to ensure that necessary expansion
gaps are left between all fixed vertical planes in the room, including doors, walls, cabinets and other fixed objects.
Tel:+8618967125110
Whatsapp:8618967125110
Email:market@flysnowfloor.com
Add:Nice Science Park,Guali Town,Xiaoshan,Hangzhou City,China

 English
 Spanish
  Portuguesel